The Complete Guide to Hiking in Cold Rain — the Conditions That Actually Cause Hypothermia
Quick Answer: The most dangerous hiking conditions for hypothermia aren’t freezing ones — they’re temperatures between about 35°F and 50°F combined with rain and wind. Wet clothing loses most of its insulating value, and wind strips heat from a wet body far faster than from a dry one. The prevention is a layering system with no cotton anywhere, a genuinely waterproof shell with pit zips, dry insulation kept sealed in your pack, sustained calorie intake, and a hard rule about turning around before you’re cold rather than after. Recognizing early hypothermia in yourself is unreliable, which is why the rules have to be set in advance.
Every autumn, search and rescue teams pull hikers off trails in conditions that don’t look dangerous. Forty-five degrees. Steady rain. A breeze. Nobody thinks of that as hypothermia weather, and that’s precisely why it is.
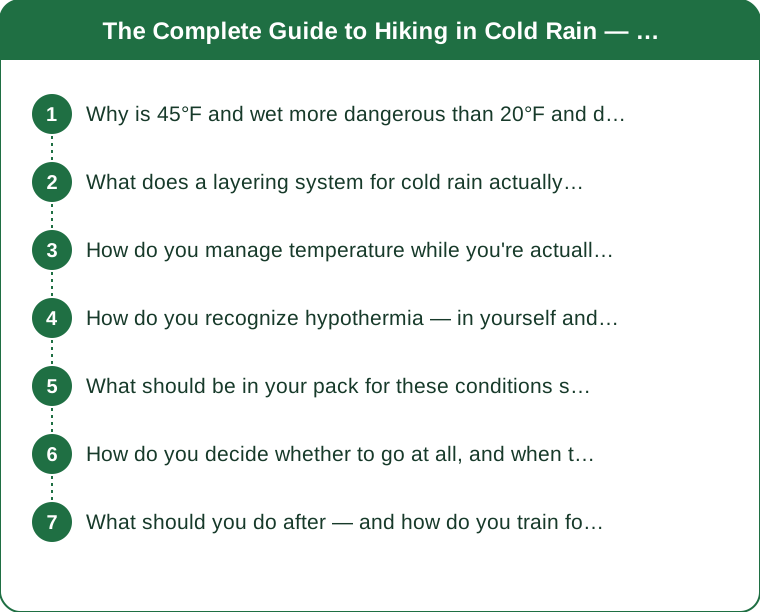
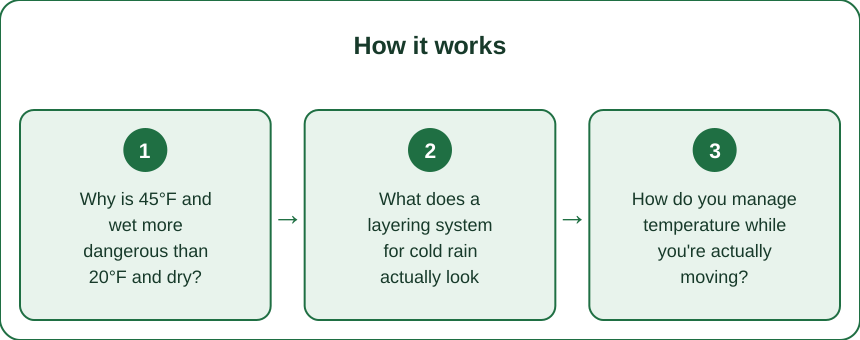
Why is 45°F and wet more dangerous than 20°F and dry?
Because of what water does to insulation and what wind does to a wet body.
Insulation works by trapping still air. Every insulating material — down, fleece, wool, synthetic fill — creates pockets of air that your body warms and that then resist heat loss. Water displaces that air. Wet down loses nearly all of its insulating value. Wet fleece and wool retain substantially more but still lose a significant fraction. Cotton, which absorbs many times its weight in water and holds it against the skin, is worse than useless — it actively conducts heat away.
Water conducts heat away from the body roughly 25 times faster than air. A thin film of water on your skin, continuously refreshed by rain, is a highly efficient cooling system.
Wind multiplies both effects. Moving air strips the warm boundary layer from around your body and drives evaporative cooling from wet surfaces. The combination of wet and windy at 45°F can produce heat loss comparable to a much colder still, dry day — and unlike the cold dry day, nobody dressed for it.
Then there’s the psychology. At 20°F you take it seriously. You bring the parka, the hat, the gloves, and you check the forecast twice. At 45°F you bring a light jacket and go. The gap between the actual risk and the perceived risk is what makes these conditions the ones that catch people.
And the exertion trap closes it. While you’re climbing, you generate substantial heat and feel fine — often too warm. You sweat, which wets your base layers from the inside. Then you stop at the summit, or start descending at a lower effort, and the heat production drops by most of its value while the wet clothing stays. The temperature you feel while moving tells you almost nothing about the temperature you’ll feel five minutes after you stop. This is the single most common sequence in autumn hypothermia cases: hike up warm and damp, stop, and cool very fast.
What does a layering system for cold rain actually look like?
Three functional layers, plus a rule about what never comes.
Base layer — moves moisture, never cotton. Merino wool or a synthetic base. Merino’s advantage in these conditions is that it retains a meaningful amount of warmth when damp and resists odor over multiple days. Synthetic dries faster and costs less. Either works; cotton does not, under any circumstances, in any weight. A cotton t-shirt under a good shell is a genuine hazard, not a minor compromise.
Mid layer — insulates while working. Fleece in the 100 to 200 weight range, or a light synthetic-fill jacket. Synthetic fill over down for anything wet, because synthetic retains a substantial fraction of its loft when damp while down collapses. If you love your down jacket, it belongs in a dry bag as your emergency layer, not on your body in the rain.
Shell — waterproof and breathable, with pit zips. The pit zips matter more than the membrane’s brand name. Ventilation is how you avoid soaking your base layers from the inside while climbing, and a shell without a way to dump heat will wet you out regardless of how good the fabric is. Look for a hood that adjusts and moves with your head, sealed seams, and a length that covers your hips.
Bottom half: synthetic or wool hiking pants, never jeans. Rain pants in your pack. Wet legs matter less than a wet torso for core temperature, but soaked cotton pants in wind are a real contributor.
Extremities:
- A warm hat, wool or synthetic, in the pack even on mild days. Heat loss from an uncovered head is real and it’s the cheapest layer you carry.
- Gloves, plus a spare dry pair in a bag. Wet gloves in wind are how hands stop working, and hands that don’t work can’t open a pack or a zipper.
- Wool socks, plus a dry spare.
The layer that saves you is the one that stays dry. Whatever your emergency insulation is, it goes in a dry bag or a heavy-duty plastic bag inside your pack, and it does not come out until you need it. A puffy that got damp “just in case” during the ascent is no longer an emergency layer.
How do you manage temperature while you’re actually moving?
Actively, and more often than feels necessary.
The governing principle: be slightly cool while climbing. If you’re comfortable at the trailhead, you’re overdressed for the first climb. Being slightly chilly for the first ten minutes is the correct starting state, because you’ll warm up within that time and then keep warming.
Adjust before you sweat, not after. Once your base layer is wet from sweat, you’ve lost the game and you’re managing consequences. Open the pit zips, drop the hood, unzip the front, take off the hat — do it on the climb, not at the top. Most experienced hikers vent continuously rather than stopping to change layers.
Stop-and-add is the essential habit. The moment you stop moving — a snack break, a summit, a view — put a layer on immediately, before you feel cold. Heat production drops within a minute or two of stopping and the wet clothing starts working against you right away. Waiting until you feel cold means the core has already started dropping.
On the descent, add a layer. Descending generates far less heat than climbing at the same speed, and it often coincides with the coldest, most exposed part of the day and with rising wind. The number of people who get into trouble on the way down rather than the way up is not a coincidence.
Keep breaks short in bad conditions. A long lunch stop in cold rain is where core temperature drops. Eat while walking, or take five minutes rather than twenty.
Change socks at the halfway point if they’re soaked. It takes three minutes and it substantially changes foot temperature for the second half.
Watch the wind more than the temperature. A ridge or an exposed col can change effective conditions dramatically in a hundred meters. Layer up before you step onto exposed ground, not once you’re on it — putting a shell on in 30mph wind on a ridge is a genuinely difficult task with cold hands.
And keep eating. Digestion and metabolism are your heat source. A hiker who’s stopped eating is a hiker whose furnace is running low on fuel, and the effect on cold tolerance is direct and fast.
How do you recognize hypothermia — in yourself and others?
The hardest part is that self-assessment fails early, which is why partner-checking matters.
Mild hypothermia — core roughly 90°F to 95°F:
- Shivering, which may be intense and uncontrollable
- Loss of fine motor control — fumbling with zippers, buckles, and pack straps
- Slurred or slowed speech
- Confusion, poor judgment, and apathy — the classic “umbles”: stumbles, mumbles, fumbles, grumbles
- Withdrawal from conversation, wanting to be left alone
The critical detail: the person affected usually doesn’t recognize it. Impaired judgment is an early symptom, not a late one. Someone in mild hypothermia will often insist they’re fine and want to keep going. Hiking partners must check each other, and any group in cold wet conditions should agree in advance that anyone can call a stop.
Moderate to severe — below about 90°F:
- Shivering stops. This is not improvement — it is a serious deterioration sign, because the body has lost the ability to generate heat by shivering.
- Severe confusion, drowsiness, and loss of coordination
- Sometimes paradoxical undressing, where the person removes clothing
- Weak pulse, shallow breathing
This is a medical emergency requiring evacuation and professional care.
Field response for mild hypothermia:
- Stop the heat loss first. Get out of the wind and rain — under trees, behind a boulder, in an emergency bivy.
- Remove wet clothing and replace with dry. This is why the dry layer in the pack exists.
- Insulate from the ground, which draws heat fast. A pad, a pack, anything.
- Add warm sugary drink and food if the person is fully alert and able to swallow.
- Passive rewarming with insulation. Body heat from another person inside shared insulation helps.
- Get moving toward shelter if the person is capable — gentle exertion generates heat.
What not to do: alcohol, which increases heat loss; vigorous rubbing of extremities; or aggressive external heat on a severely hypothermic person, which can cause dangerous complications. For anything beyond mild, the priority is careful handling and evacuation.
This is general information, not medical advice. Take a wilderness first aid course if you hike regularly in these conditions.
What should be in your pack for these conditions specifically?
Beyond the standard essentials, six items earn their weight.
1. A dry insulating layer in a waterproof bag. Synthetic-fill jacket, ideally. This is your emergency reserve and it must be genuinely dry when you need it. A dry bag or a doubled heavy-duty plastic bag; pack covers alone are not reliable.
2. An emergency bivy or heavy-duty space blanket. Modern reflective bivies weigh a few ounces and cost very little. In wet cold, this is the single highest-value emergency item you can carry, because it stops both wind and further wetting and reflects radiant heat back.
3. Spare hat, gloves, and socks, all dry, all bagged. Extremity function is what lets you help yourself.
4. High-calorie food that doesn’t require preparation. Nuts, chocolate, bars, dried fruit. In cold conditions, carry more than you think — cold weather increases calorie burn meaningfully. Something with sugar for fast availability plus fat for sustained output.
5. A hot drink in an insulated bottle. Genuinely useful, both physiologically and psychologically. A liter of hot sweet tea is a meaningful intervention in a cold group.
6. A headlamp with fresh batteries. Autumn light disappears fast, weather makes it worse, and a slowed group in bad conditions frequently finishes in the dark. Cold reduces battery performance, so carry spares and keep them warm in an inside pocket.
Also worth carrying: a lighter or fire starter in a waterproof container, a small first aid kit, a whistle, and a fully charged phone in a waterproof bag kept warm — cold drains phone batteries very quickly, and a phone in an outside pocket can die before you need it.
Pack organization matters here. In driving rain you do not want to unpack your entire bag to find the dry layer. Put emergency items in one clearly identifiable dry bag at the top. Practice getting to it with gloves on, once, at home. It sounds excessive until the first time you try it with numb fingers.
On pack covers versus liners: a liner — a dry bag or trash compactor bag inside the pack — is far more reliable than an external cover, which channels water into the back panel in sustained rain. Many experienced hikers use both.
How do you decide whether to go at all, and when to turn around?
Set the rules before you’re cold, because judgment is the first thing that degrades.
Reading the forecast for these conditions:
- Temperature alone is not the signal. Look at temperature, precipitation probability, wind speed, and the elevation-adjusted forecast for your high point. Temperature drops roughly 3 to 5°F per 1,000 feet of elevation gain, so a 50°F trailhead can be a 38°F summit.
- Wind is the multiplier. Sustained wind above about 15mph in wet conditions changes the risk category.
- Timing matters. Rain starting mid-afternoon as you descend a ridge is a different proposition from rain that’s been falling since dawn and that you dressed for.
Set turnaround criteria at the trailhead, out loud, with your group:
- A hard turnaround time, based on daylight with a two-hour buffer
- A weather trigger: if conditions reach a specific stated point, you descend
- The rule that anyone can call it, with no discussion and no consequences. Groups get into trouble when nobody wants to be the person who ends the day.
Signs it’s time to descend, regardless of the plan:
- Anyone in the group is shivering after adding layers
- Anyone is fumbling with zippers or gear
- Anyone has gone quiet and withdrawn
- Your base layer is soaked through and you have no dry replacement
- Conditions are deteriorating faster than the forecast said
The mental trap to name in advance: summit fever, and its close relative, sunk cost. Two hours of climbing invested makes turning around feel like waste. It isn’t. The mountain doesn’t move, and a turnaround is a completed decision, not a failed hike.
Tell someone your plan and your expected return time, every time, including on familiar trails. In poor conditions this is what shortens a search from hours to minutes.
And a note on solo hiking in these conditions: the partner-check that catches early hypothermia doesn’t exist when you’re alone. If you hike solo in cold wet weather, be conservative in a way you wouldn’t need to be with a group, carry a communication device with satellite capability if you’re beyond cell coverage, and set your turnaround criteria more tightly.
What should you do after — and how do you train for it?
Recovery and preparation both get skipped, and both matter.
Immediately after a cold wet hike:
- Change out of wet clothes at the car, all of them. Keep a full set of dry clothes and a towel in the vehicle. The drive home in wet layers with the heater on is a surprisingly common way for people to stay cold for another hour.
- Warm drink and food within thirty minutes. You’re likely in a meaningful calorie deficit and rewarming costs energy.
- A warm — not hot — shower. Very hot water on cold extremities is uncomfortable and, in a genuinely chilled person, is not recommended.
- Dry your gear properly. Boots stuffed with newspaper and left at room temperature, not next to a radiator, which cracks leather and delaminates adhesives. Shells hung, not stuffed.
Gear maintenance that keeps you safe next time:
- Reproof your shell periodically. The durable water repellent finish wears off, and a shell that’s “wetting out” — where the face fabric saturates and stops breathing — feels like it’s leaking even when the membrane is intact. Wash with a technical cleaner and reapply DWR once or twice a season with regular use.
- Check seam tape for peeling, which is the usual failure point on older shells.
- Wash insulation layers occasionally; body oils reduce loft over time.
Training that actually transfers:
- Hike in mild bad weather deliberately, close to home, on short familiar routes. This is how you find out that your shell’s hood blocks your peripheral vision, that your gloves are useless wet, and that you can’t reach your snacks with the pack cover on — all discoveries you want to make two miles from the car.
- Practice a full layer change in the rain, once. It takes ten minutes and it’s genuinely different from doing it in a bedroom.
- Build the aerobic base so that your pace has margin. A hiker working at their limit generates heat but has no reserve for a longer day, and fatigue accelerates heat loss.
- Take a wilderness first aid course if you hike regularly in shoulder-season conditions. Recognizing and managing hypothermia in a partner is a skill, and the course is a weekend.
This is general information, not medical advice.
TL;DR:
- The hypothermia danger zone is roughly 35–50°F with rain and wind, not deep winter — because nobody dresses for it.
- No cotton anywhere; synthetic insulation over down for wet conditions; a shell with pit zips you actually use.
- Be slightly cool while climbing, and add a layer the moment you stop, before you feel cold.
- Keep one dry insulating layer sealed in the pack and never wear it “just in case.”
- Judgment degrades early, so set turnaround rules out loud at the trailhead and let anyone call it.
The conditions that catch experienced hikers aren’t dramatic. They’re a mild grey Saturday with a breeze.
Keep Reading
This article is for general informational and styling purposes only. Fit, sizing, and product availability may vary — check current details before purchasing.